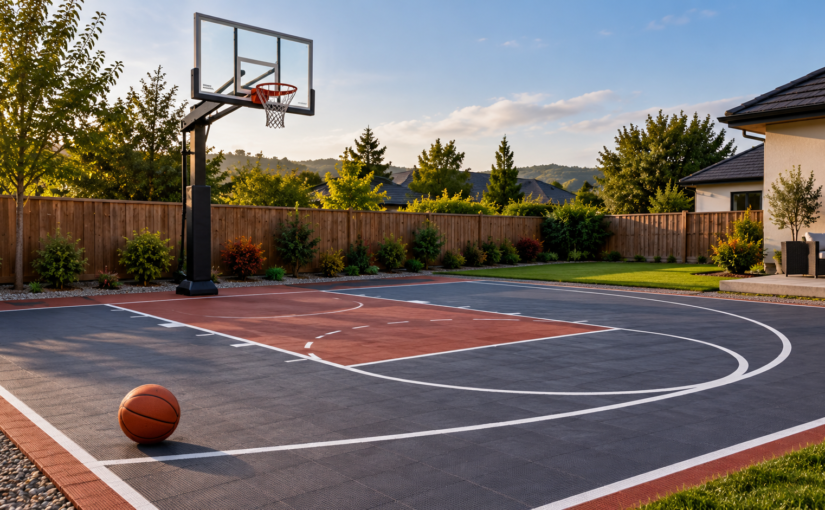
Building a DIY basketball court can be as simple as placing a hoop on an existing driveway. If you’re starting with grass or bare ground, you’ll need a stable foundation, proper drainage, and a suitable playing surface.
For most beginners, the easiest installation uses existing concrete or asphalt. You can add court lines, install modular sports tiles, or create a small shooting area without major construction.
This guide explains how to plan, build, and maintain your own basketball court, including which jobs are better left to professionals.
Can You Build a Basketball Court Yourself?
Yes. A DIY basketball court can range from a basic driveway setup to a permanent backyard basketball court.
The three main options are:
- Existing pavement: Install a portable basketball hoop and mark shooting spots.
- Modular sports tiles: Lay interlocking tiles over a suitable concrete or asphalt surface.
- New construction: Prepare the ground, install a foundation, and finish the court surface.
A simple driveway setup is usually the easiest choice for beginners.
Building a new half court or full court requires more planning. Excavation, drainage, compaction, and concrete pouring are generally better handled by professional contractors.
You can still manage the project while hiring specialists for these stages.
Materials and Tools for a DIY Basketball Court
The materials depend on your court size and construction method.
For a basic setup, you’ll need some of the following:
- Basketball hoop and backboard
- Basketball, measuring tape, stakes, and string
- Chalk and weather-resistant court-line paint
- Broom and cleaning equipment
- Optional modular basketball court tiles
- Protective equipment and manufacturer’s instructions
New construction may also require gravel, compacted aggregate, concrete or asphalt, drainage materials, and hoop anchors.
Choose materials that suit your ground conditions and intended use. A surface for casual family fun may not need the same layout as one designed for competitive play.
How to Build a DIY Basketball Court Step by Step
If you already have suitable pavement, you can skip the new-foundation work in Steps 3 and 4.
If you’re starting from grass or dirt, prepare the ground and install an appropriate foundation before adding the playing surface.
For a closer look at ground preparation, drainage, surface installation, and professional contractors, see our basketball court installation guide.
Step 1: Plan Your Court Size and Layout
Decide whether you want a small shooting area, half court, or full basketball court.
If you’re still deciding on a layout, our backyard basketball court guide covers different sizes, surfaces, and design ideas.
A compact residential setup might measure around 20 × 25 feet. A full NBA court measures 94 × 50 feet, but you don’t need regulation dimensions to practice at home.
Carefully measure the available space and leave sufficient room around the perimeter for players to move safely.
Consider the basketball hoop’s overhang, nearby buildings, fences, trees, and other obstacles.
Sun orientation also matters. Positioning the court to reduce glare can make daytime games more comfortable.
For official measurements, see our basketball court dimensions guide.
Step 2: Choose a Location and Plan Drainage
Choose a location with stable ground, adequate space, and minimal obstacles.
Avoid areas with exposed rocks, large tree roots, or persistent standing water.
A basketball court needs a smooth playing surface with an appropriate drainage slope. Slightly sloping the court away from buildings may help direct rainwater toward a suitable outlet.
Follow the selected surface manufacturer’s requirements rather than assuming every court needs the same slope.
VersaCourt’s subsurface preparation guidance provides examples of foundation and drainage considerations.
Check local regulations, property boundaries, setbacks, and permit requirements before starting construction.
In the United States, contact 811 before excavation to arrange underground utility marking. Private lines may require separate locating.
Step 3: Prepare the Ground or Existing Surface
For an existing driveway, begin by sweeping away leaves, dirt, and other debris.
Inspect the concrete surface or asphalt for cracks, uneven edges, slippery coatings, and water pooling.
A damaged foundation needs attention before installing court tiles or paint. Covering serious cracks or unstable pavement won’t solve the underlying problem.
For a new court, mark the construction perimeter using stakes and string.
Clear vegetation and unsuitable soil, then prepare the subgrade according to the foundation design.
Proper compaction is crucial for reducing settlement and uneven surfaces.
Standard rigid modular tiles should not be laid directly over grass or loose ground.
Step 4: Install the Foundation and Plan the Hoop Footing
Concrete and asphalt are common basketball court foundation materials.
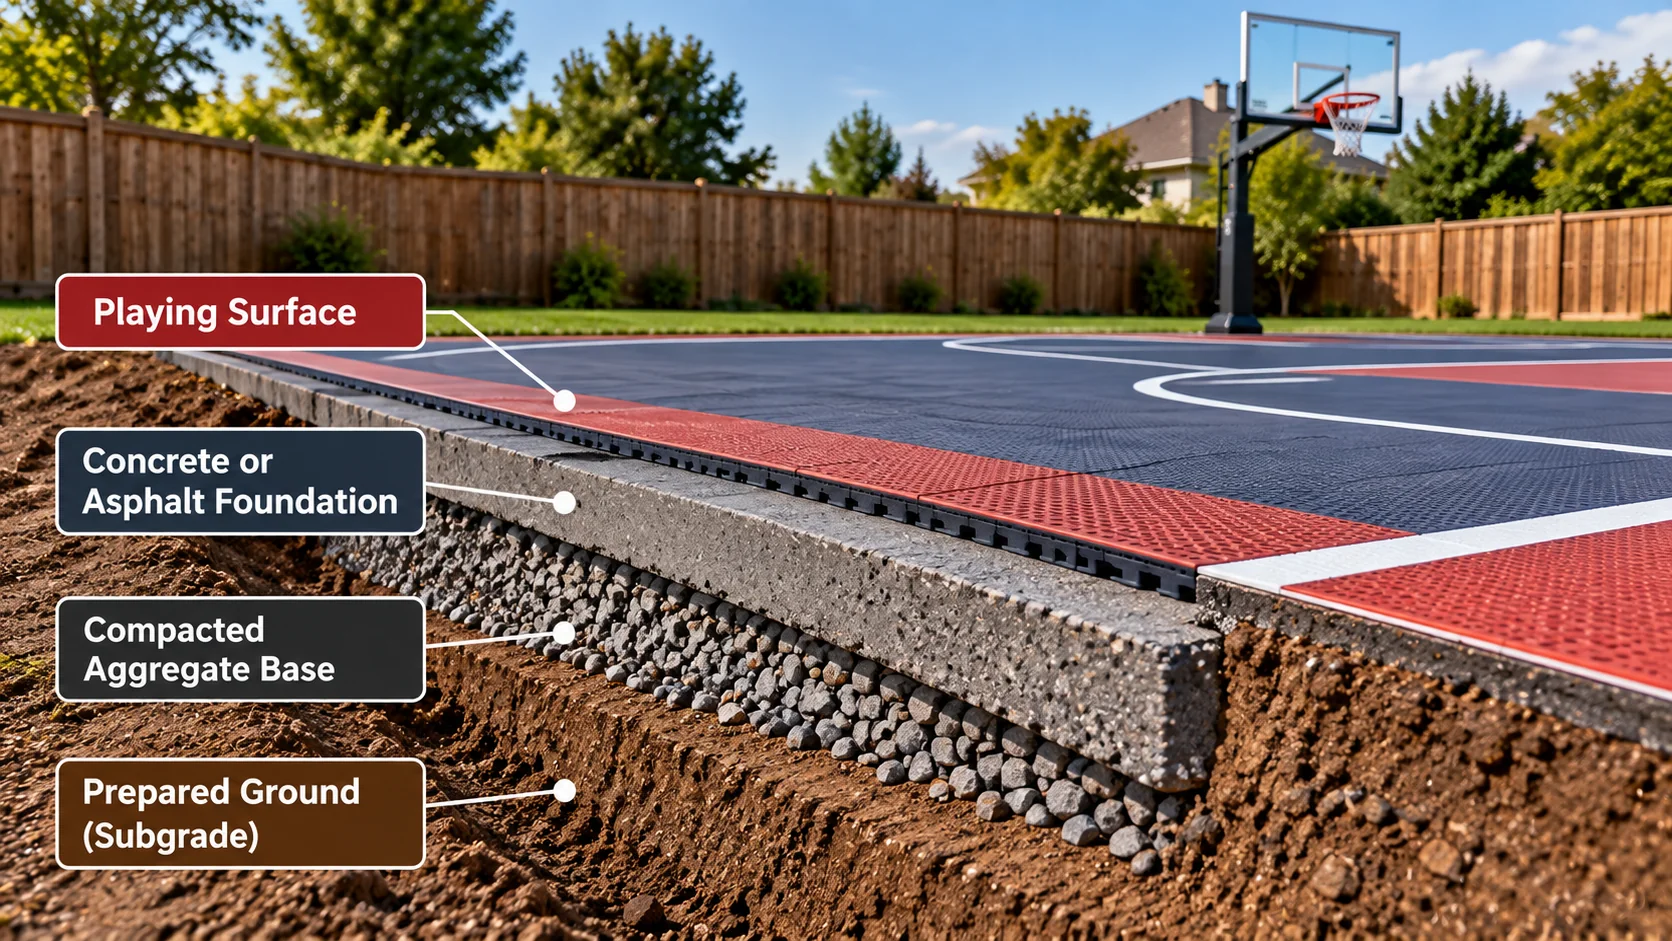
Some manufacturers recommend a reinforced concrete slab approximately 100 mm (4 inches) thick. However, the correct thickness depends on soil conditions, climate, drainage, and expected loads.
The gravel or aggregate sub-base must also follow the foundation design. There isn’t one universal thickness suitable for every court.
Concrete pouring requires appropriate preparation, reinforcement, finishing, and curing.
For an in-ground basketball hoop, plan the pole location and anchor system before paving.
Some systems require a separate concrete footing or an expansion joint between the hoop foundation and court slab.
Don’t assume concrete is ready for hoop installation or surface coatings after two days. Follow the specified curing and installation requirements.
For detailed construction prices, see how much it costs to build a basketball court.
Step 5: Install Your Basketball Court Surface
You can choose bare pavement, modular sports tiles, or an acrylic sports coating.
Concrete or asphalt: Suitable existing pavement may be used directly if it provides adequate traction, drainage, and a reasonably smooth playing surface.
Modular basketball court tiles: These interlocking tiles snap together over an approved foundation. Some designs provide drainage openings and a more forgiving playing surface than bare pavement.
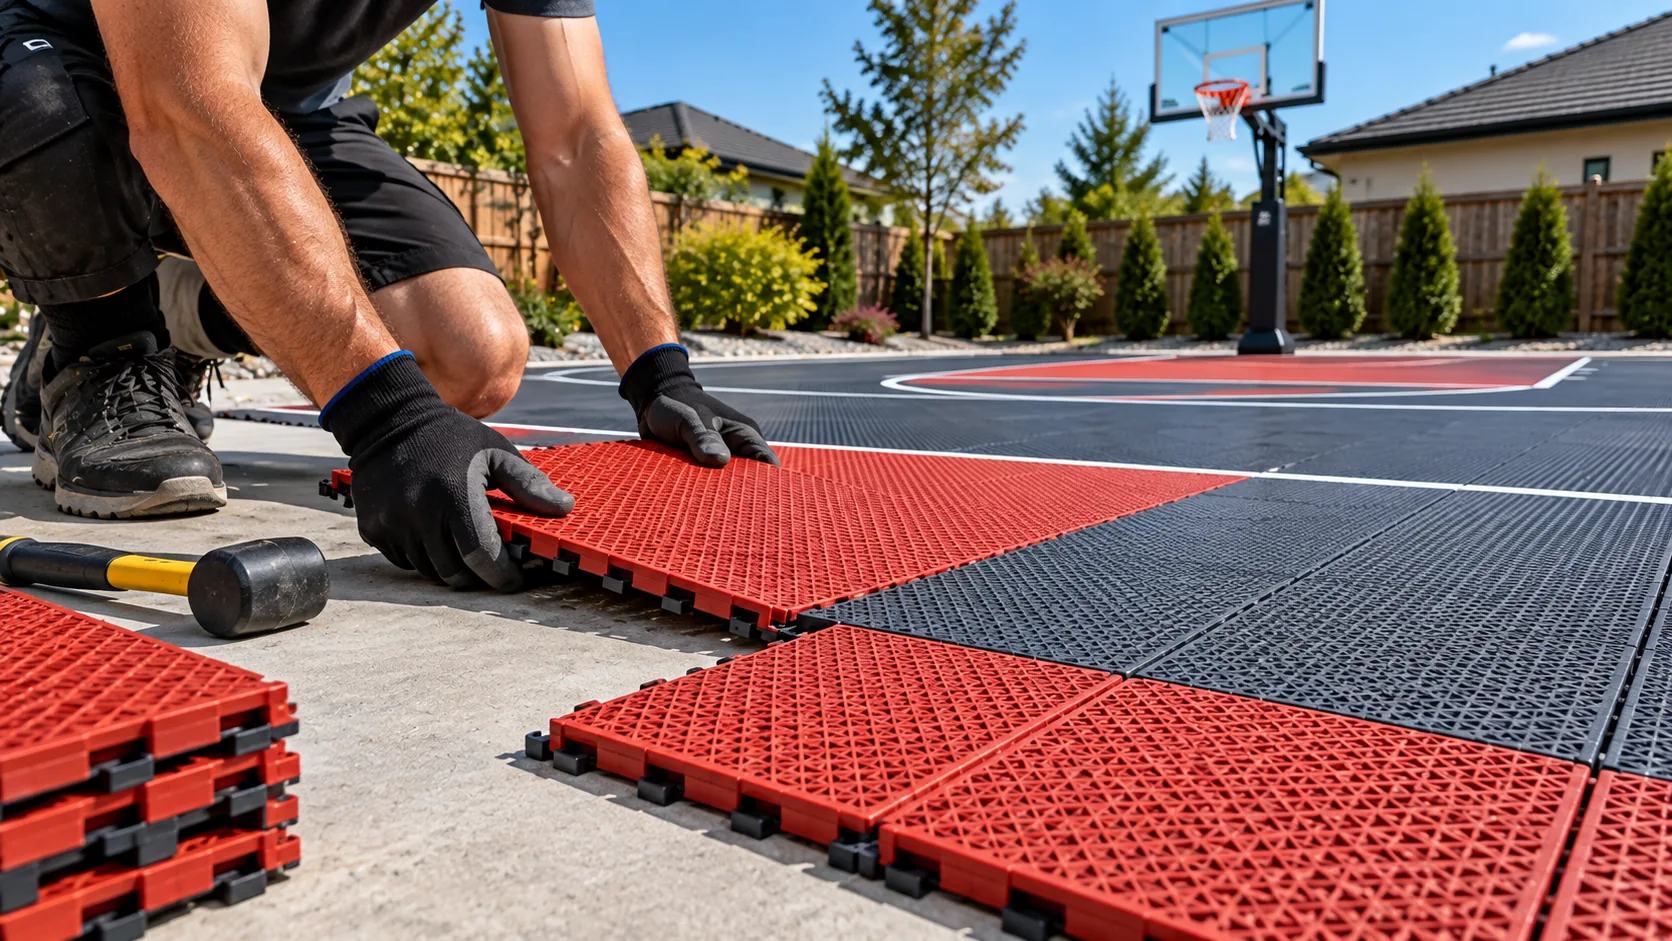
Clean the base, lay out the sections, and check their alignment with the basketball hoop before connecting them.
Leave the manufacturer’s required expansion gaps. Some systems allow tiles to be trimmed around obstacles using specified tools, but follow the product instructions for cutting and edge finishing.
See VersaCourt’s residential installation guidance for a manufacturer example.
Acrylic sports coating: This creates a colored court surface using compatible preparation products, coatings, and line paint.
Application requires suitable weather, correct surface preparation, and adequate drying time.
Whichever option you choose, consider traction when wet. Some basketball surfaces can become slippery in rain, so follow the manufacturer’s wet-use and maintenance guidance.
Step 6: Assemble and Secure the Basketball Hoop
Basketball hoops can be portable, in-ground, or wall-mounted.
A portable hoop is often the simplest option for a driveway court. Fill or weight its base exactly as instructed and position it away from playing hazards.
An in-ground hoop requires a properly designed footing and secure anchors.
Follow the manufacturer’s instructions for concrete requirements, curing time, pole installation, and backboard assembly.
Goalrilla’s basketball hoop installation guide provides an example of model-specific requirements.
Wall-mounted hoops require a suitable supporting structure and approved mounting hardware. Don’t assume an ordinary wall can support one safely.
Heavy hoop assemblies may require several adults or professional installation.
Once installed, confirm the rim height and basket position. The standard regulation rim height is 10 feet, not the height of the backboard itself.
See our basketball hoop height guide for more information.
Step 7: Measure and Mark the Court Lines
Choose one basketball rule set before painting the game lines.
NBA, NCAA, FIBA, and high school courts use different measurements.
Begin with the basket position, then carefully measure the baseline, free-throw line, and any three-point markings.
Use chalk, string, and a measuring tape to mark the layout before painting.
Check that the lines are straight and that the measurements match your chosen court diagram.
Apply compatible, weather-resistant sports-court line paint according to the manufacturer’s instructions.
Some modular tile kits already include court lines, so additional painting may not be necessary.
See our basketball court diagram guide for official layouts.
Step 8: Inspect Your Finished Basketball Court
Before playing, check the hoop, court surface, and surrounding area.
Make sure all required curing and drying periods have passed.
Inspect modular tiles, perimeter edges, anchors, and ramps for loose or raised sections.
Remove debris, check for slippery areas, and confirm that rainwater drains away correctly.
Keep the court clean by sweeping leaves and dirt regularly.
Inspect cracks and surface damage promptly. Follow the manufacturer’s maintenance instructions to help protect your court for many years.
Common DIY Basketball Court Mistakes
Avoid these common problems:
- Installing tiles on grass: Standard rigid tiles require an approved foundation.
- Ignoring drainage: Standing water creates hazards and may damage the surface.
- Using damaged pavement: Tiles and coatings won’t repair an unstable base.
- Guessing concrete thickness: Follow site-specific construction requirements.
- Installing a hoop too early: Respect the footing’s required curing period.
- Using unsuitable paint: Choose compatible sports-surface products.
- Mixing court measurements: Follow one consistent basketball court diagram.
Careful planning and preparation can prevent expensive repairs later.
How Long Does It Take to Build a DIY Basketball Court?
A portable hoop on suitable existing pavement can be a relatively quick project.
Modular tile installation over a prepared foundation may take several hours to a couple of days, depending on the court size and product.
Building a new concrete or asphalt court can take several weeks or longer.
Excavation, weather, curing, surface installation, and permits all affect the schedule.
Always follow the manufacturer’s instructions before moving to the next construction stage.
DIY Basketball Court FAQs
What Is the Cheapest Way to Make a Basketball Court?
Using a suitable existing driveway with a portable basketball hoop is generally the simplest low-cost option.
Temporary court markings can provide practice targets without major construction.
How Much Does It Cost to Build Your Own Basketball Court?
The cost depends on the court size, foundation, surface materials, equipment, and hired labor.
Converting existing pavement is usually less involved than constructing a new court from bare ground.
See our basketball court cost guide for detailed estimates.
What Can I Put in My Yard for a Makeshift Basketball Court?
If you have suitable pavement, you can use a portable hoop and temporary shooting markings.
For a grassy yard, avoid installing ordinary rigid sports tiles directly on the lawn. Those systems generally need a stable, approved foundation.
How Thick Should Concrete Be for a Basketball Court?
Some manufacturers recommend a reinforced concrete slab around 100 mm (4 inches) thick.
However, the correct specification depends on ground conditions, climate, drainage, and expected loads.
Have the foundation design confirmed by a qualified local contractor or engineer.
Final Thoughts
A DIY basketball court doesn’t have to involve major construction.
Starting with suitable existing pavement is usually the easiest approach. You can add a basketball hoop, court lines, or modular sports tiles to create a useful practice space.
For a new court, prioritize a stable foundation, proper drainage, and safe equipment installation before choosing the finishing details.
3 thoughts on “DIY Basketball Court | How to Build Your Own Court”
Comments are closed.